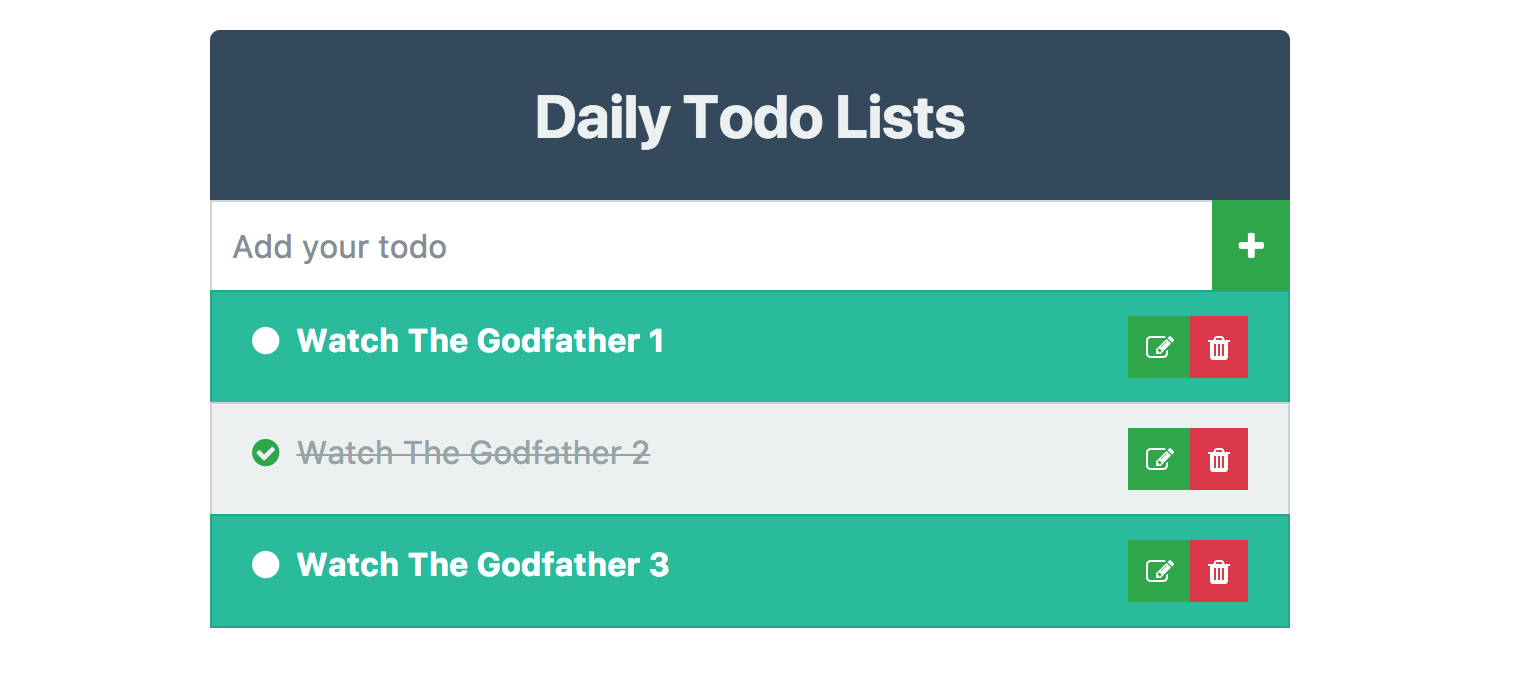
Generally, Go is perfect for building microservices, but that doesn’t mean building a simple MVC app is difficult. Go has built-in support for parsing HTML templates, although we won’t focus on that in this case.
First, let’s write the Go code to serve an HTML page and save it in a directory.
In this example, let’s create a directory called todoapp and inside it, create a home.tpl file. Paste the HTML content in home.tpl, which will make an HTTP call to our backend application.
I won’t go into detail about the template and the Vue.js code written in the home.tpl file in this article.
Now, let’s start building the backend. Create a main.go file inside the same directory where home.tpl is located.
We will be using the chi router for routing, mgo for MongoDB to persist our data, and renderer to render the responses. You can install these packages using go get. Here’s the command:
$ go get github.com/go-chi/chi
$ go get gopkg.in/mgo.v2
$ go get github.com/thedevsaddam/renderer
Now, let’s start writing our code. Open the main.go file in your favorite editor.
First, we’ll initialize the essential constants and variables, and create some types to use in our application. Here’s how you can set it up:
Let’s walk through the above example. Between lines 4–9, we declared a constant block to define essential constants such as the hostname, database name, port, etc.
Between lines 11–15, we declared two structs, Todo and TodoModel. Both structs have the same number of fields, and the field names are identical. However, in TodoModel, the ID field is of type bson.ObjectId. We used the bson tag so that the mgo package can work with these tags. In contrast, the Todo struct uses the json tag to allow the JSON decoder to properly serialize the Go type into typical JSON.
If you examine the example, you’ll notice that the first two lines, where we declared two variables. The first variable is used to hold a pointer to the renderer.Render type, and the second holds a pointer to the mgo.Database. These variables are initialized between lines 27–33.
Now, let’s proceed to part two of the code.
If you take a look at the example above, between lines 1–4, we wrote a function called homeHandler which renders our home page using the render package.
Between lines 6–37, we wrote the main function, which serves as the entry point for the application. Inside the main function, at line 7, we created a channel of type os.Signal. At line 8, we registered this channel with the os.Signal package, specifying os.Interrupt as the argument. This essentially listens for OS signals, such as when the user interrupts (e.g., by pressing Ctrl+C), and notifies the channel. We use this signal to gracefully shut down our server.
At line 10, we declare and initialize a chi router variable. At line 11, we apply the Logger middleware, which comes with the chi router as a sub-package, to log incoming requests to stdout.
At line 16, we declared an http.Server variable named server and initialized it using a struct literal. Between lines 24–29, we start a goroutine to launch the server. At line 31, we release the signal from the blocked channel, and at line 33, we declare a context with a 5-second timeout, passing it to the server’s Shutdown method. At line 35, we use the defer statement, ensuring that as soon as the main function ends, the deferred cancel function is called to release the context resources.
At line 14, we mount a route group called todo, and between lines 39–48, we register a route group that contains four routes.
Now, let’s move on to the third part of the code.
In the example above, between lines 1–36, we wrote the createTodo function, which is responsible for creating a new todo item. At line 2, we declared a variable of type Todo, and between lines 4–7, we decoded the incoming JSON data into the t variable. If the decoding fails, we return a JSON response to the user using the renderer.JSON() method. Between lines 10–15, we check if the title is empty and, if so, send a JSON response indicating the error. At line 18, we declared the tm variable and initialized it using the struct literal with data from the t variable and other relevant information. Between lines 24–30, we insert the data into MongoDB. Finally, at line 76, we send a JSON reply to the user, confirming the creation of the todo with the generated todo_id.
The updateTodo and deleteTodo functions follow a similar structure. When fetching the todo list from MongoDB, we use the fetchTodos function. Between lines 94–102, we transform the fetched todoModel data into the Todo type and send the list to the consumer in JSON format. And that’s it!
As you can see, I wrote this article in a somewhat random order to tell you the story. It may be challenging for beginners to write the full source code and get it running correctly, but don’t worry here is the full source code. Clone it to your $GOPATH/src directory and run the go get . command to install the dependencies.
If you enjoyed this article, feel free to follow me on GitHub, hit the appreciate button, and share the article with others. Thank you!